

How To Create An Animated Web Banner In Photoshop Cc
Creating web banners isn't the most glamorous of jobs in the world but it is something that every designer will be required to practice at some signal in their career, probably many times over. Although there are no hard and fast rules when information technology comes to creating web banners, it goes without proverb that the type must be large and the bulletin punchy.
Equally we're animating this every bit well, I'd propose no more than than 3 slides or blithe elements equally people will simply not watch information technology. Flashing elements can also help to catch the attention of the viewer.

Over the next few steps I'll demonstrate how to setup and create a uncomplicated blithe web banner that once mastered will exist a cakewalk to utilise to any new task in the future.
01. Setup your document
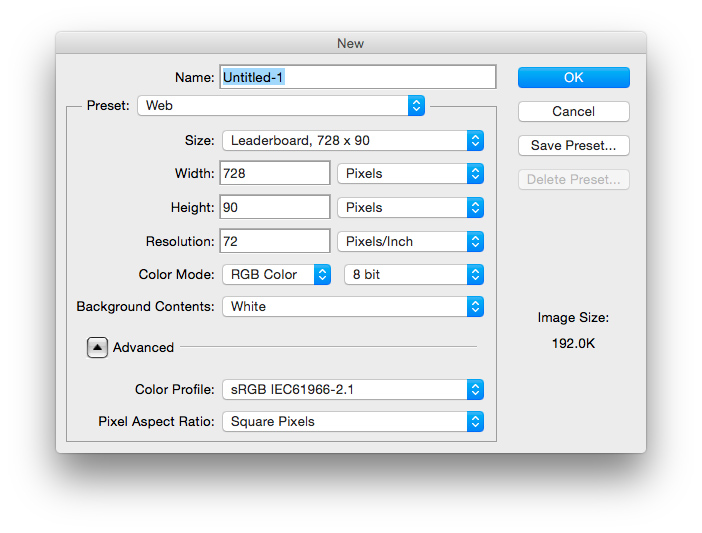
Launch Photoshop, navigate to file > new and select Web from the Preset drop-down menu. From the size drop-downwards select leaderboard or if your dimensions vary then cull custom and manually enter the pixel dimensions.
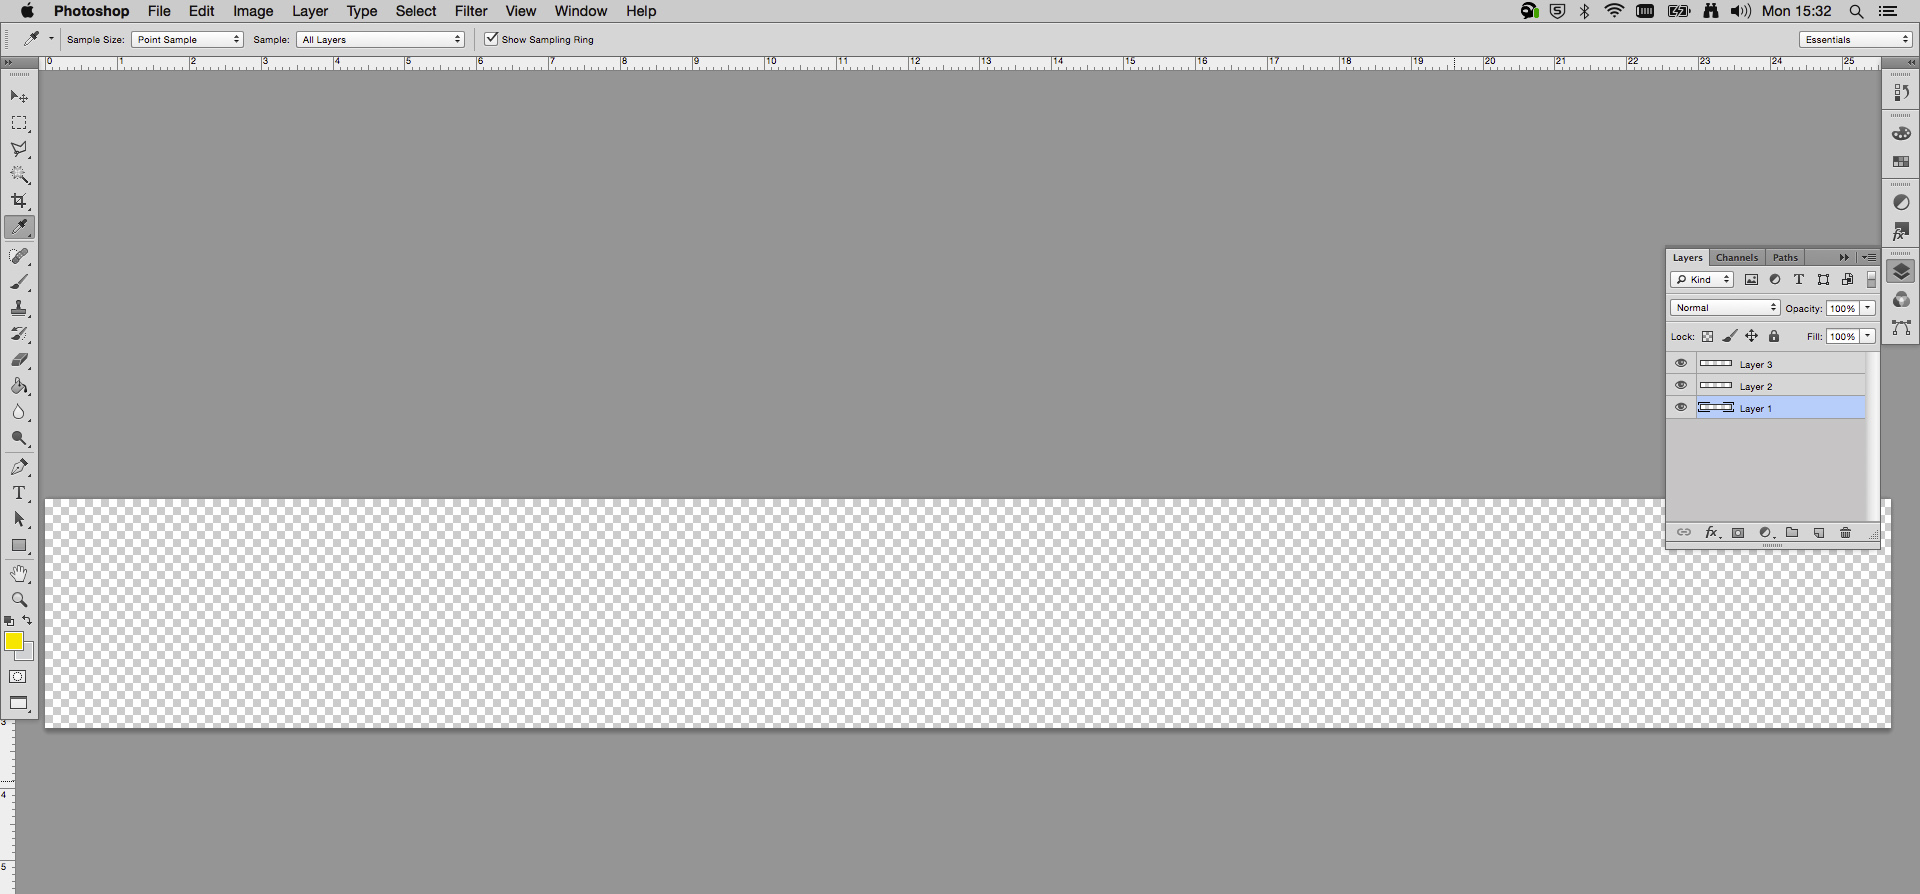
With snap to document premises selected from the view menu, drag guides to snap to all bounds of the document.
02. Adding graphic elements
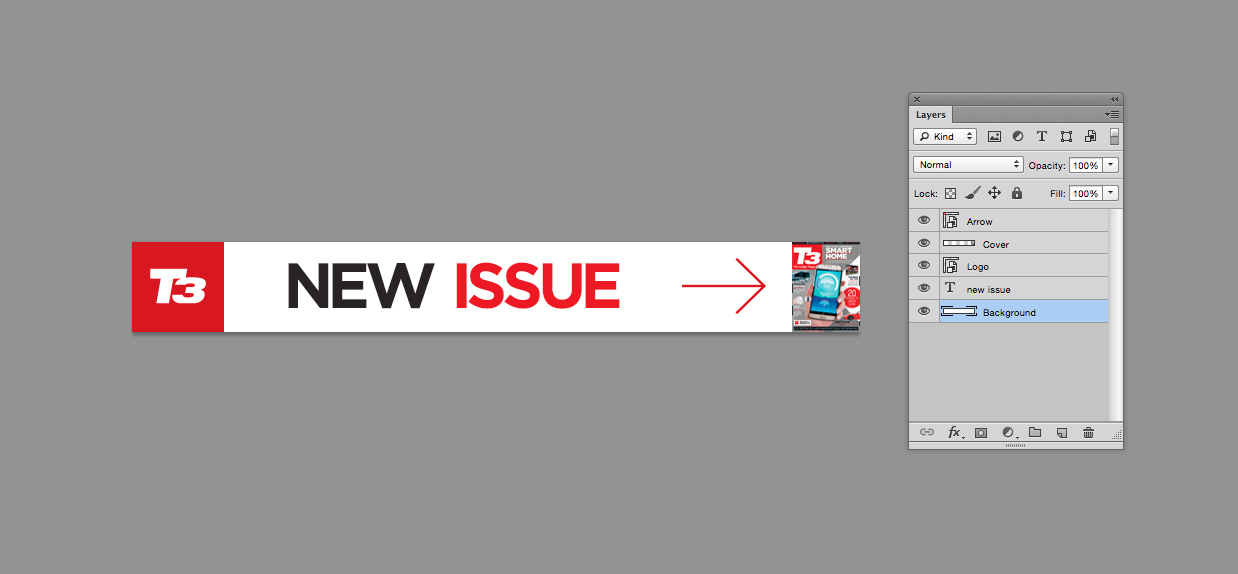
Now to identify our essential design elements. In the above case I pasted in the T3 square logo and every bit I'd created the guides could re-size information technology and make it snap to the document premises hands. Paste in an arrow graphic that we'll utilise later and using the type tool prepare your message for the first slide. Paste in any images that you demand and so brand sure that yous name up all your layers appropriately.
03. Creating the secondary slides
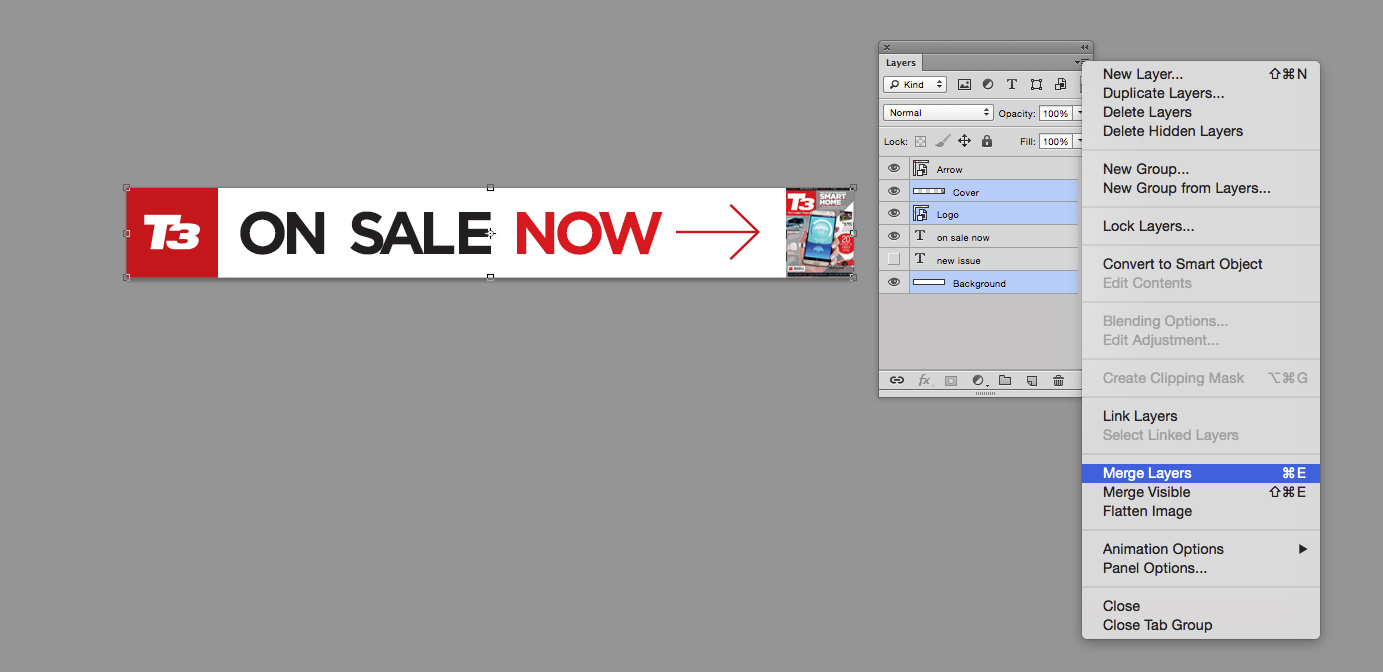
Now simply duplicate your blazon layer, turn off the type layer beneath and type in the next stage of the message, in this instance "ON Sale Now". One time you're happy that you take all the elements in place, merge down as many of the layers equally possible. As the background, the logo and the cover paradigm volition remain static we can merge this down leaving u.s.a. with four layers, the background, the blazon layers and the arrow layer.
04. Create the frame animation
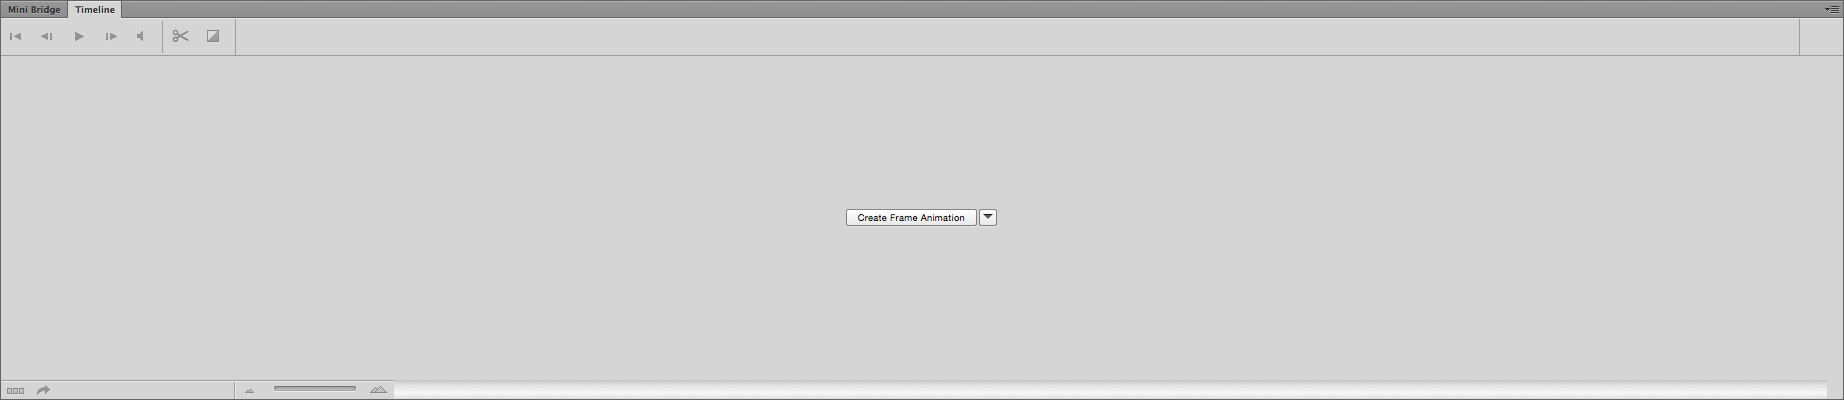
Now simply click on the timeline tab at the bottom of the window or navigate to window > Timeline. Click on the small-scale arrow in the middle of the window and select "Create frame animation" and then click the button. Now turn off all the layers apart from the background layer and the outset message layer. Apply a one 2d delay to the frame from the drop down carte du jour on the small animation frame. Now just click hit the "indistinguishable selected frames" push button in the timeline only plough off the offset message and turn on the second message. Repeat this process for all of the layers, finishing with the arrow layer.
- The ten greatest Olympic Games logos of all fourth dimension
05. Make the arrow flash and arrange timings
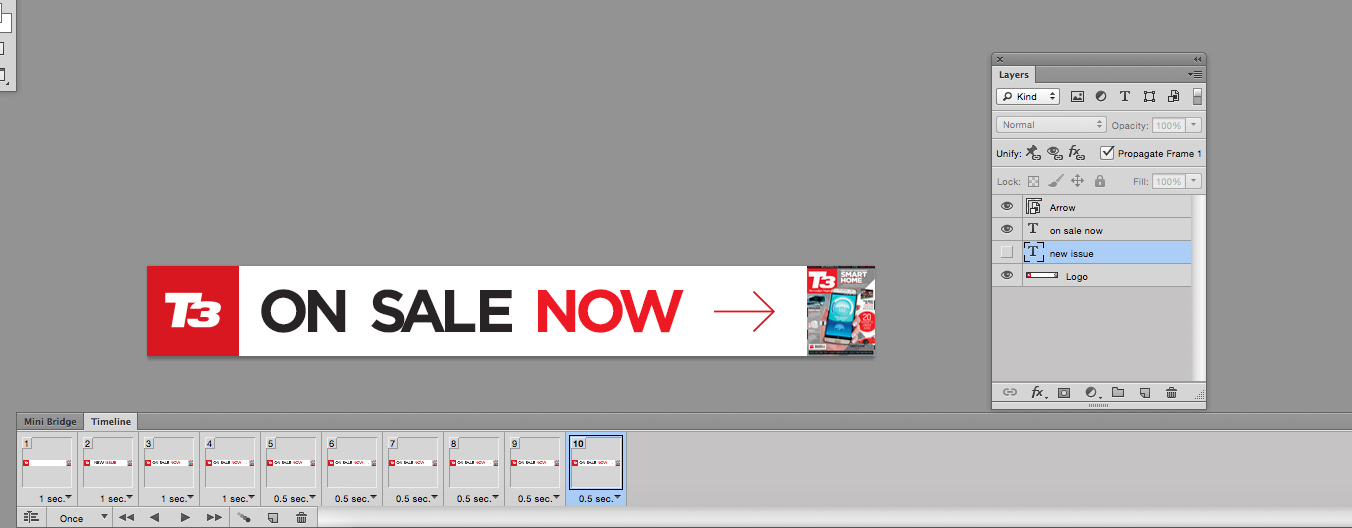
To brand the arrow wink simply hitting "Duplicate selected frames" from the timeline and turn the arrow off. Adjust the time to 0.5 seconds and echo the process turning the pointer on and off in the layers panel so that information technology appears as if it's flashing. Finally you may want to adjust some of the timings until you're completely happy. People take very curt attention spans so in that location'southward no point in being deadening with the frame rate, just they do all the same need to be able to read it.
06. Relieve for web and devices
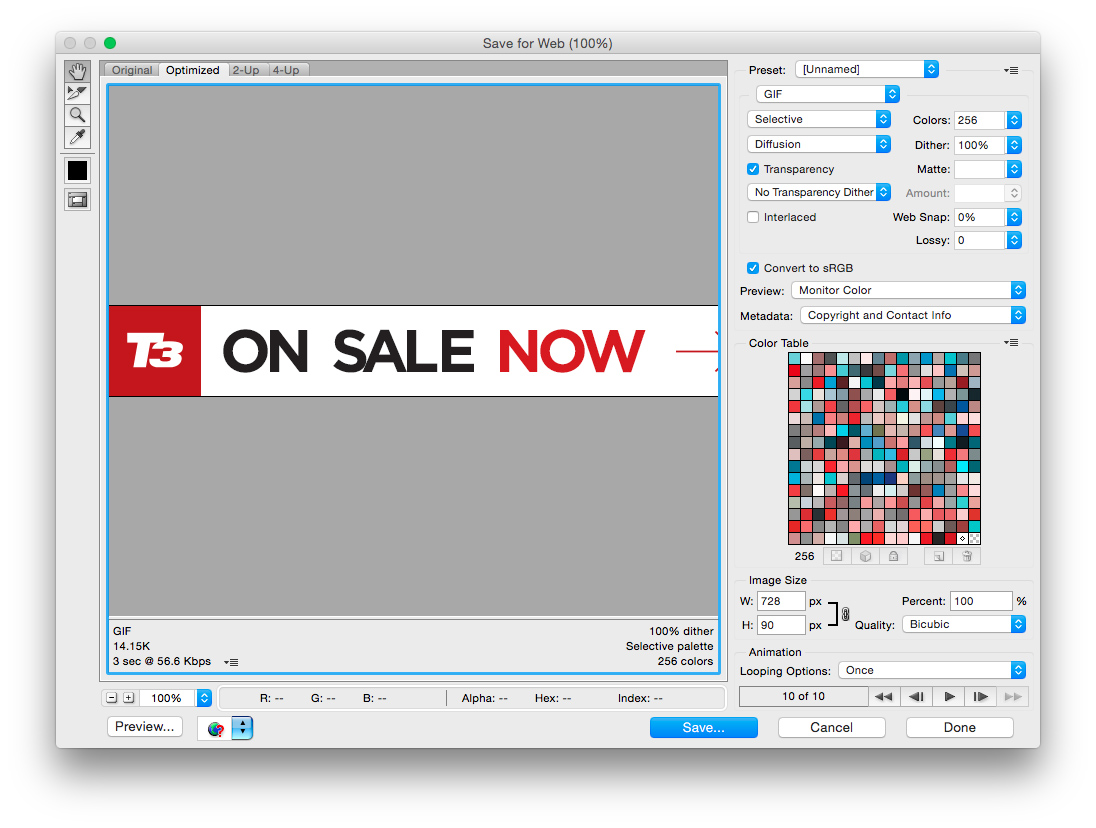
Finally navigate to "Save for web" and select GIF from the drop-downwardly menu. You lot tin also reduce the quality slightly here in order to go the file size down. Once y'all're satisfied salve out the gif then only drag it into a spider web browser to test it out.
Source: https://www.creativebloq.com/how-to/how-to-create-an-animated-web-banner-in-photoshop
Posted by: peaseclas1988.blogspot.com
0 Response to "How To Create An Animated Web Banner In Photoshop Cc"
Post a Comment